
Showing posts with label art. Show all posts
Showing posts with label art. Show all posts
Thursday, September 2, 2010
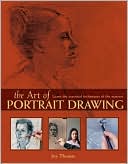
Books you should get to improve!-Concept Art


Monday, August 2, 2010
Light and Color-Tutorial

Hey guys, this post is one the most important ones if you really want to become a successful concept artist or any other artist at that. No matter how detailed your illustrations or concepts are, they are not going to look realistic without knowing how to properly introduce light that makes every painting look real. When it comes to color, well, you can't successfully add interest nor can you guide the eye of a viewer if you don't have good understanding of the color theory and how it works. These 2 are very important and also hard skills to master. If you become successful in these 2, your art work will improve drastically and get you ahead of others by far.
light and color-tutorial
Monday, October 12, 2009
Modeling Hands by Steven Stahlberg

Many start up artists as well as advanced have problems drawing hands. This short modeling hands tutorial by Steven Stahlber will help you to imrove your hand drawing ability.
"To improve modeling you need to look at the real thing, I've found the best references here.
Some quick notes that might be helpful for beginners modeling hands..."
To read the full tutorial click here.
Ron Lemen: Constructing the Human Head

Tutorial by Ron Lemen.
"Step 1. This is the biggy. This step dictates the entire head drawing, and or pose for that matter if you are attaching an entire body to this. Start with a sphere, freehand will do, so long as it reads as a ball. You are going to divide the sphere into halves, then fourths. There will be 8 sections total..."
To read more:
http://www.anticz.com/heads.htm
Sunday, October 11, 2009
Sketching and Inking by Chelsea Brown

"The firs thing you'll need is a sketch. Make sure you do it in pencil. It doesn't matter how neat it is since you're going to ink over it and erase it later. Just make it as neat as you need it to be to know what lines you'll be inking over. Make sure you sketch light enough that you'll be able to completely erase the lines once you're
finished inking."
Step 2:
Now it's time to ink! Select your favorite inking pens and carefully go over the lines you wish to keep. Inking left to right if you're right-handed, or right to left if you're left-handed might be a good idea to avoid smearing your lines. If you make a mistake, don't worry! You'll be able to fix it once we've scanned the drawing into Photoshop.
Step 2:
Now it's time to ink! Select your favorite inking pens and carefully go over the lines you wish to keep. Inking left to right if you're right-handed, or right to left if you're left-handed might be a good idea to avoid smearing your lines. If you make a mistake, don't worry! You'll be able to fix it once we've scanned the drawing into Photoshop.
Step 3:
"Once your inking is completely dry, you can erase your sketch. You may find there are small areas where you made mistakes. Again, don't worry, you'll fix this in a moment."
Subscribe to:
Posts (Atom)